Saturday, December 22, 2012

Quiltcon Show

So, how many of you entered quilts for Quiltcon? I only entered one, but there were over 700 entries. That's pretty incredible!! I am  so looking forward to that show. They announce on December 31st who made it and I'm so excited to find out. Here is a sneak peak at my entry. I will reveal it soon :)


 I hope you guys have a fantastic Holiday and are filled with Joy. I have some last minute sewing to finish up...eeekkk....

~January~

Tuesday, December 18, 2012

Modern BOM

I really loved doing the Modern BOM on Sew Mama Sew.


It was such a fun sampler and really helped me to think outside of the box. I finished this baby, but haven't had the chance to quilt it just yet. I have about three tops finished and just need to quilt them. Hopefully after the holidays I can get right on that :) 
I wasn't a big fan of the improv block so I tried my hand at paper piecing. My friend Diane From the Blank Pages is an amazing paper piecer :) and pattern maker. I loved her Double Star Pattern and she has a fantastic step by step tutorial for it. It really made paper piecing not so scary. I'm super excited because I get to see her in a few days - I can't wait :) I made some great friends at the The Sewing Summit and she was one of them and our roomie. 


Here Is The Finished Top 
I would love to turn several of these blocks into quilts of their own. someday. 

I hope you guys are having a wonderful and Joyful Holiday!!
~January~


Monday, December 17, 2012

I'm not in hiding :) anymore


I can't believe how long it's been since I posted last. I went to Sewing Summit and came back full of inspiration and exhaustion. I have taken a break from almost all technology and plowed through tons of projects that needed to get done by the end of the year. I have missed blogging something serious. I will be posting my VERY LATE recap on Sewing Summit shortly, now that I'm back in the saddle again.

 My boys love to read and love the Bearsteain Bears so they each got a quilt for their bed.


My oldest son loves red, so I gave him more red crosses and did some straight line quilting on his.

My youngest son loves green so he got more in his quilt. I did a little FMQ on his.  They are so different and wanted a different back on their quilts. They loved their quilts!! Mom - 1


I have quite a lot to show for and will be posting again. Thanks for sticking with me :) 
~January~


Monday, September 10, 2012

Sewing Summit Registration


Don't forget about REGISTRATION tomorrow!! I have some mixed feelings about the whole process, but I'm going to be positive and just thankful I get to go!! I will be happy when tomorrow's registration is done!! I hope you guys get at least a few classes you want!! I'm really excited!! Can you tell by all the exclamation marks!!! :) 

~January~

Pincushion Organizer


Yay, I can finally show this cute Pincushion Organizer!! At our last MQG meeting we got to reveal who our secret guild member was. I wanted to make something for her that she could use and found this adorable weighted pincushion by Elizabeth Hartman


At first it looked a little complicated, but Elizabeth's tutorials are fantastic. Once I read all the directions it was very easy and went together very quickly. It has pockets to hold your scissors, seam ripper, stiletto or whatever you need to have handy. My favorite part is the finished bag to hold all the clipping and trimmings. It's so great because I tend to be a little messy and then I have to stop and clean up before I can go on. Now, when I have a few extra minuets I will be making one for myself. They would also make great gifts for the holidays!! Just something to keep in mind since this year is flying by at a break neck speed. 


I hope you guys are having a great Monday morning!! 
~January~

Thursday, September 6, 2012

Friendship Quilt Blog Hop


When Diane first sent emails out about this blog hop, I was involved in another one and was a little tired. However I was instantly intrigued and wanted to find a way to swing it. I was really glad when she said it wouldn't start until September. This gave me time to actually think about it and get inspired. Her concept was super cool!! We used to give Friendship Bracelets out to our Besties and since we quilt now - Friendship Quilts.  You will want to head over to Diane's Blog to get more details on the hop and how you can also participate (some amazing prizes will be awarded) She has put together a great tutorial and she has some great inspiration for you guys. 


I am really excited to see what everyone comes up with!! I went and checked out Whitney over at The Peacock Tree yesterday and she made a really cool pillow. If you haven't stopped by be sure to check it out. The first thing I did was look around for some inspiration. I came across this photo thanks to my pal Google.


I was drawn to the one in the middle and got out the ol' graph paper. This was the first time I've used graph paper. I was pretty excited that I made a pattern all by myself :) Not that long ago I didn't think that was possible, but I did it!! I'm not that great at math (getting better) so this part was interesting. Trying to figure out how big each piece needed to be. 


Had a couple of color ways and figuring out the actual blocks. 


I decided to go with the original color way. Remember the giveaway I won - the colors from that matched perfectly. They were made for this. Thanks again Jenelle!!
Here is the final mini - haha if you can call it that. This sucker is a long piece of wall art :) It's really skinny though. 


Here's my outside picture haha - We water twice a week and look how crappy our grass still looks. It looks like it has the mange :)

I was really nervous about trying my hand at some free motion. After many failed attempts and lots of ripping I finally did some I was proud of. 


So it's a Friendship Quilt - Now I have made some fantastic friends this year - Lord only knows how I have needed some good friends lately. He is never early and He is never late - He is always on time! So thanks again God for answering my prayers. This friend and I have become very close in just a short time. We are very different, but get along really well. It feels like we've been friends forever. She has no idea that she's getting this which is funny to me because she has seen it and said she loved it. I hope she wasn't lying!! That would suck :) So Julie will you except my Friendship Quilt? Thanks guys for hanging around. Here is a list of the upcoming bloggers. Be sure to give them all love and make some Friendship Quilts of your own - you may just win a prize!


 September

3: Friendship Quilts Kick Off! at from blank pages...

THAT'S ME!

4: Diane of from blank pages..., me again, I'll share my project and 

a tutorial first 

5: Whitney of The Peacock Tree

6: January T of Sew Sew Go

7: Melinda of Quirky Granola Girl

10: Courtney of Mon Petit Lyons

11: Jill of Made with Moxie

12: Danielle of Fresh off the Spool

13: Kelsey of Kelsey Sews

14: Kristy of Quiet Play

17: Marika of Live, Laugh, Love... Sew

18: Karen of Sri H. Designs

   - LINKY FOR YOUR PROJECTS OPENS

24: A SURPRISE LINKY PARTY OPENS!!! (You do NOT want 

to miss this one!)

25: Secret

26: Secret

27: Secret

28: Link up closes for projects

30: Suprise Linky closes 


October 1st: at from blank pages...  Judges Picks announced, 

Random drawing for the rest of the prizes 


The Fabulous Sponsors!!!!

Fabric.com is also offering one Gift Card, of unknown value. 
I have a feeling someone is going to be very lucky!

The Fat Quarter Shop is giving away 1 layer cake, and 2 charm packs
to three lucky winners. The fabric lines will be announced towards the end of the month.


Pink Chalk Fabrics is giving away five $20 Gift Cards
to five lucky winners!


Fresh Squeezed Fabrics
Randi has offered one $25 Gift Card to her shop.


Sew Fresh Fabrics is giving away one $40 Gift Card! 
Wahoo!! ;)


Amanda is offering one Amy Butler Lark
layer cake or jelly roll. (winner picks their preference)


Are you guys in or what? This is going to be super cool and I can't wait to see what you guys come up with. Good luck :)

~January~

Thursday, August 30, 2012

QUILTCON


Tell me who is going and what classes did you sign up for? I am super excited to have gotten into Elizabeth Hartman's class for machine quilting. It filled up so quickly!! I hope you got the classes and workshops you hoped for and I look forward to meeting you in February. 

~ January ~ 

Tuesday, August 28, 2012

Dresden Table Runner

Take Two - I wrote this post last night and then it conveniently disappeared. I Still Love Technology...Always and Forever...


I got this magazine a few months ago and Loved It!!! It's filled with greatness from large quilt to placemats and everything in between. 
I love that they are starting to make magazines for Modern Quilters.

I fell for this table runner right away and wanted to make it. My mom came over a few days later and did the same. She said she would love it in Red and Purple. I went to my stash and started pulling fabrics. 

I'm loving the gray and yellow trend that's going on right now!
I cut out the Dresdens and threw them on the design wall. I really love having a design wall, it makes such a difference. I don't know why every time I want to take pictures the sun hides from me :)
It was a dark day - sorry for the bad picture

This dude went together really quickly!!


I have a really funny story.  I decided to do some echo quilting to finish it up. I finished it up, took it off my machine and the stitching started to unravel. Seriously hilarious, right? Needless to say the project got shelved for a while. I talked to our "Quilt Mama" at my local Modern Quilt Guild and she gave me some great advice. I got out my seam ripper and got to rippin. It took me 2 hours to rip out all the stitches!! The next day I started echoing again. I wasn't feeling it this time around. Here we go again....Thank goodness I only had to rip out 4 dresdens. I decided to go with straight line quilting and I love the way it turned out. 


Yay, I got another project checked off my list!!! I'm pumped :)


I'm linking up to  Quilt Story's Fabric Tuesday. Some amazing work has been posted. Hop on over when you get the chance.
I hope you guys are having a wonderful day!
~ January ~


Monday, August 27, 2012

The Good, The Bad and the Ugly!!

First the Good...The winner of the giveaway is

True Random Number Generator                                                                  8Powered
I love snack food, so I'm going with chips and dip! Any given night I'd choose that over dinner!
Congrats Jenny!!! I emailed her and will be shipping it out this week. I have another one for September the 1st that you guys are sure to love. I was a little late this month so they will be back to back. Life sometimes gets in the way. 
The Bad...I just wrote a nice, long blog post only to have it not save. And the Ugly....The feeling I have inside me right now!! Haha just kidding - well sort of :) 

~ January ~


Tuesday, August 21, 2012

My first win and a giveaway

I can't believe I actually won something!!! How many of you have said these words? 
Jenelle @ ECHINOPS & ASTER was hosting a giveaway for a huge milestone on her blog - 200 GFC!! Now she is already over 300 Congrats again Jenelle :)  It was a fantastic giveaway!! A Fat Quarter bundle from Pink Chalk Fabrics of some of the new Kona Cottons. Look how beautiful they are. 


They do such a lovely job over at Pink Chalk Fabrics. They have such a great selection of modern fabrics and Kathy has a fantastic blog. If you haven't been by there - (which is probably impossible) scoot on over right now! And look how it came, all tied up with a cute little tag :) 


I had to watch my friend Julie who came by the other day. She tried to pocket my goodies haha. She said "do you need to check my bag before I leave?" You better believe it!! I don't blame her, they are so pretty :)

 This month is a hand stitching giveaway. I have a fantastic pattern for a Mini Quilt from Lizzy House. I love the embroidery. This little guy is so cute!


This leather thimble is so soft and feels great when stitching for an extended period of time. 


Last but certainly not least is some fabulous floss. In my opinion  you can never have enough :) 


 Here is this months giveaway bundle of hand stitching goodness!


I will randomly pick a winner on Monday the 27th through Random.org. To enter just leave a comment on this post telling me what your favorite thing to eat is. :) I hope you guys are having a great week!! 
January T.

Monday, August 13, 2012

Let's Get Acquainted!! Blog Hop - Block Binder Tutorial

Hey Everyone!!! Well, today is my day on the  Let's Get Acquainted!! Blog Hop. I just want to thank Beth of Plum and June for hosting this great get together :) Also be sure to check out Sara's tutorial today over at Sara Sews Quilting Blog. I look forward to seeing what she's doing. I have to say I have been a little nervous. I have never put a tutorial together before so I hope it's easy to understand and that you all like it. Before we get into the picture heavy tutorial I'll tell you a little bit about myself. My lovely mother named me January Faith - can anyone tell that  she was a hippie? ;) I have been married to my awesome husband Justin for almost 9 years. We have two great little boys who are so full of life!! I'm homeschooling them so sometimes it can be a bit crazy in the house. I started quilting around a year ago and wouldn't have believed you if you told me where I would be now. Here are some Q&A's Beth had for us.

 - Favorite quilting tip(s)
There are so many great quilting tips that it's hard to narrow it down. I think the most important parts for me are: 
 1. Accurate Cutting 
 2. Making sure you have a 1/4" seam (the 1/4" foot is essential) 
3. Pressing, Pressing & Pressing!
                     
- Favorite fabric (or wish list fabric)
I heart Kona Solids

- Favorite craft book
The Practical Guide To Patchwork by Elizabeth Hartman

 - Favorite music to listen to while quilting
  I am a Jammer and have all sorts of music playing while I sew.
        
- If I'd only known - what you wish you knew about blogging before you started your blog

Just to get in there and do it!! I was so afraid to start one that it took me months before I actually did. I look back and think how silly I was. Everyone starts out the same way. Don't poo poo the small beginnings!! 

One more thing: I am a visual learner. So I like tutorials that have lots of pictures. Warning!!! This post has a ton of photos and they may not all be necessary, but they're here :) 

Now if you are still with me on with the show.

I had been thinking for a while about what I would make for this hop and to tell you the truth, I had no idea. I had no inspiration and 
really thought "Oh Crap what have I gotten myself into!" :)
I said a little prayer and got struck. There's nothing new under the sun, but I liked the idea I just had and ran with it. A block binder or portfolio. Anytime I take my blocks anywhere they always get wrinkled or squashed so I thought this would be perfect to keep them nice and neat.


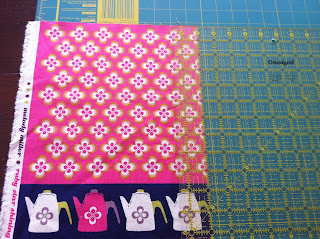
I love this fabric so much and have been crushing on the typewriters and view finders forever. 


* One quick note - upon finishing the Block Binder I noticed I had neglected to put on the zipper tape :( However Debbie over at A Quilter's Table just did an amazing tutorial on a zippered pouch and how to prepare zipper tape. This is real life and sometimes things don't go as planned.

Materials: 
1 yard of fabric - you will have leftover fabric for other projects
Canvas - I upcycled a canvas bag, but I would say 3/4 yard
A package of Heat N Bond or some kind of fusible web
A 36" long zipper - I had a hard time finding one this size, but I found one at Whipstitch Fabrics
And Coordinating Thread


I took my 12 1/2" ruler and cut out (2) fronts

Front 1 - Outside


Front 2 - Inside


And (2) Backs


Back 1 - Outside


Back 2 - Inside


You also need (2) 1 1/2" X 12 1/2" strips for the spine of the binder.

Here is one of the strips.

 To give the binder some structure and stability I used a canvas bag and cut my pieces out of it. Any canvas should do the job just fine. 

 I cut the same (2) 12 1/2" X 12 1/2" squares. I have to say after finishing my project that I would recommend cutting the canvas down a little bit, but you can do that at a later step.


I used Heat n Bond that I picked up at my local craft store. Follow the directions on the back of your package. I wanted to fuse the fabric to the canvas so that it wouldn't wrinkle.


 I traced a 10" sq on the paper side and cut out 4 of them. I had to piece some leftovers to get 4, but that doesn't matter. 


 I fused it to the canvas and then peeled the paper off.


 Then line up the Front Outside fabric and fuse it to the canvas.


Repeat and do the same thing with the second piece of canvas and the Back Outside piece of fabric.

Congrats!! We made it to the zipper portion of the tute.
I unzipped the zipper and started pinning it to the ooppps wrong side of the fabric. You live and learn, right? My outside back has now become my outside front :) 


Make sure when you are pinning your zipper that the zipper pull is facing the inside, because we will be turning this inside out so you want it to come out right. I hope that makes sense. I pinned wrong and realized my mistake before stitching. Thank goodness!!


Pinning around the corner was something I hadn't done yet - it was a lot of fun!!


 Ok when it's all pinned in place were going to sew this bad boy down. I started with the zip opened a little.


 When I got to the zipper pull, I needled down and I lifted the presser foot and zipped it all the way up.


 We are now getting to the first curve. My advice is to go slow. The zipper is pretty hard and it takes some time to get around it. I found that if I pushed the curve in toward the middle of the bag and just inched along it worked perfectly.  


 Lift the presser foot and unzip until the zipper pull is past the foot, lower presser foot and then sew on. 


Zip it back up and place the backing fabric on top with right sides together. Your only going to sew the three sides that has the zipper already attached. 


Again with the zipper. Unzip...Sew...Lift...Zip...Sew


Going around the curve again, just nice and slow. 


 All stitched and ready to flip over. On the backside you have your canvas that is ready for the heat n bond. Follow the same directions as you did before. 


 Peel the paper off and turn the bag inside out or right side out. Sorry I didn't have anyone to take a picture of me doing it. It's a little sticky, but don't be shy you can man handle it a bit.


 Heat n Bond is inside and ready to be fused.


Now we are going to do the same thing to the back. Fuse the outside fabric to the canvas. Now unzip your zipper and pin to the backing. 


It's a little more awkward to sew with the extra piece, but just go slow and you will do fine. 

Again zip it up!!


I zipped it up and turned it inside out so that when I sew it up and turn it inside out it matches the naked canvas piece.  See the pink peeking through the zipper below?


Place the inside fabric right sides together and sew around the zippered sides. 

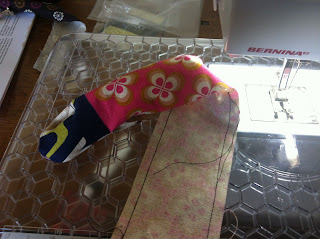
Watch the zipper pull :) Ok so this is what it will look like when it's all sewn up. Here is the fabric on one side and on the flip side


We have the naked canvas getting it's fuse on. 


Now pull and turn the bag out.
-Binder's Outside- 

-Binder's Inside-


 Now were going to iron and fuse this puppy.


*Here is where you might want to trim the canvas a bit. I would say 1/4" not to exceed a 1/2" on each piece of canvas.

 Take the two spine pieces and sew them right sides together using a 1/4" seam and leaving a 3" opening to turn it right side out -Press


Remember to put the side of the spine you want on the outside facing the the binder.

 I backstitched at the beginning and the end.


Flip it over and match up the other side. Backstitch again at the beginning and the end.


Here it is all sewn together.


Now the binder doesn't lay completely flat because I couldn't find the type of zipper that has a pull on each end of the zip. I'm keeping my eyes out for them and if you know where to get them please let me know :)


Now for a little hand stitching to sew the edges of the spine down. It gives it a more polished look. You could also try zigzagging if you don't mind the stitches on the outside of your binder. 
*Here is the reason for cutting the canvas down. I learned something new :)